

How to Replace a Ratchet Buckle on a Tie Down Strap (Step-by-Step, 2026)
- When to Replace a Ratchet Buckle
- Tools and Materials Needed
- Step-by-Step: How to Replace a Ratchet Buckle
- Step 1: Release Tension and Remove Strap from Load
- Step 2: Remove the Old Buckle from the Webbing
- Step 3: Inspect and Prepare the Webbing
- Step 4: Install the New Ratchet Buckle
- Step 5: Reassemble the Ratchet Mechanism
- Step 6: Test Before Use
- Safety Precautions
- Common Mistakes to Avoid
- Frequently Asked Questions About Ratchet Buckle Replacement
- Final Thoughts on Replacing Ratchet Buckles
Got a jammed or rusted buckle but perfectly good webbing? Don't toss the whole assembly. Learning how to replace a ratchet buckle on a tie down strap saves money and ensures safety compliance. Follow our step-by-step 2026 guide to safely swap your damaged buckle in minutes.
While ratchet buckles provide the essential mechanical power to lock down heavy loads, constant tension, harsh weather, and rigorous industrial use inevitably cause wear and tear. Ignoring a compromised buckle isn't just inefficient - it is a severe safety hazard that risks catastrophic accidents during transport. Drawing on manufacturer guidelines and real-world cargo securing expertise, the following steps will ensure your hardware replacement is executed safely and correctly.
When to Replace a Ratchet Buckle
Knowing when to replace a ratchet buckle versus when to discard the damaged ratchet strap entirely is crucial for compliance with safety standards (like FMCSA and DOT). You should conduct a visual ratchet buckle inspection before every major haul.
Signs Your Ratchet Buckle Needs Replacement:
-
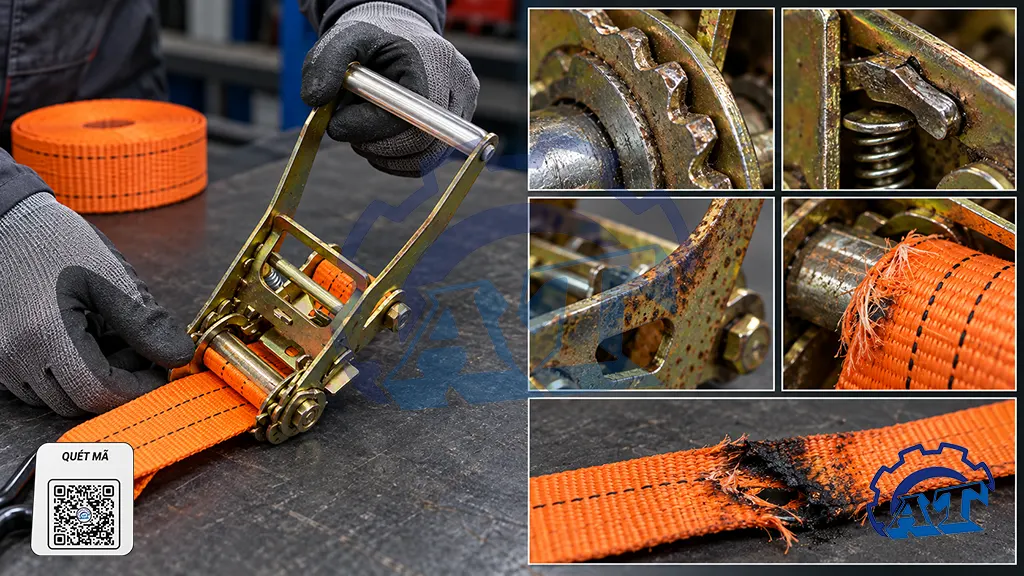
Worn or Chipped Teeth: The gear teeth are rounded off, chipped, or visibly slipping when you attempt to tighten the load.
-
Stuck Release Lever: The release lever is jammed, bent, broken, or fails to spring back into its locked position.
-
Loose Tension Handling: The main handle feels unusually loose or fails to hold tension once cranked.
-
Structural Deformation: The metal buckle frame is noticeably bent, cracked, or heavily rusted.
-
Webbing Damage at the Attachment Point: The webbing is torn or frayed right where it connects to the buckle axle.
Note: If the webbing is severely cut, burnt, or degraded further down the strap length, replacing the buckle is not enough. You must replace the entire tie down strap.
Tools and Materials Needed
Gathering the right equipment before you start will make the ratchet buckle replacement smooth and safe.
What You'll Need to Replace a Ratchet Buckle:
-
Replacement Ratchet Buckle: Ensure it matches your webbing width (1", 1.5", 2", 3", or 4") and has a Working Load Limit (WLL) equal to or greater than your original hardware.
-
Hand Tools: A screwdriver (flathead or Phillips), pliers, and a small wrench (if you are working with a bolt-on buckle style).
-
Cutting Tools: Sharp scissors or a heavy-duty utility knife to trim damaged webbing cleanly.
-
Safety Gear: Safety gloves and eye protection to guard against sharp metal edges and sudden spring releases.
-
Lubricant (Optional): Silicone spray or PTFE lubricant to ensure the new buckle operates smoothly.
Step-by-Step: How to Replace a Ratchet Buckle
Follow these steps to replace your ratchet buckle safely. Please note that this process applies to buckles attached via bolts, screws, or internal clamps. If your buckle is permanently stitched or sewn directly into a webbing loop, you cannot replace the hardware and must buy a new strap.
Step 1: Release Tension and Remove Strap from Load
Never attempt maintenance on a strap that is currently under tension. Pull the release lever to fully open the ratchet mechanism and disengage the gear. Unhook the strap from all anchor points and remove it entirely from the cargo.
Step 2: Remove the Old Buckle from the Webbing
Identify how the current buckle is attached to the webbing. Bolt-on end fittings are the most common for industrial B2B straps. Use your screwdriver, pliers, and wrench to carefully remove the bolts, screws, or retaining clips holding the webbing in place. Once the fasteners are removed, pull the webbing entirely out of the spool axle and set the old buckle aside.
Step 3: Inspect and Prepare the Webbing
Examine the end of the webbing that was attached to the buckle. Cut off any frayed, torn, or burnt sections using sharp scissors. Trimming the edges cleanly prevents further fraying under load. Ensure you still have enough strap length to properly secure your standard loads; if the strap becomes too short after cutting, you must replace the entire strap.
Step 4: Install the New Ratchet Buckle
Take your new replacement ratchet buckle and thread the cleanly trimmed webbing through the center spool slot. Follow the manufacturer's directional arrow (usually threading from the bottom up). Pull the webbing through until you have a tail of about 6 to 8 inches (15 - 20 cm). Fold that tail back over itself (about 2 - 3 inches / 5 - 7 cm) and secure it tightly using the provided bolts, screws, or clips. Tighten all fasteners completely - the webbing must not slip when pulled hard.
Step 5: Reassemble the Ratchet Mechanism
If the replacement buckle arrived disassembled or required partial disassembly to attach the webbing, carefully reattach the handle, the spool axle, and the pawl spring. Verify that the pawl drops directly and securely into the ratchet teeth without binding.
Step 6: Test Before Use
Give the webbing a firm manual pull to check the anchor point's grip. Ratchet the handle several times to confirm that the spool winds smoothly, the teeth catch properly, and the release lever disengages easily. Once verified, double-check that all bolts and screws are still tight before putting the strap back into commercial service.
Safety Precautions
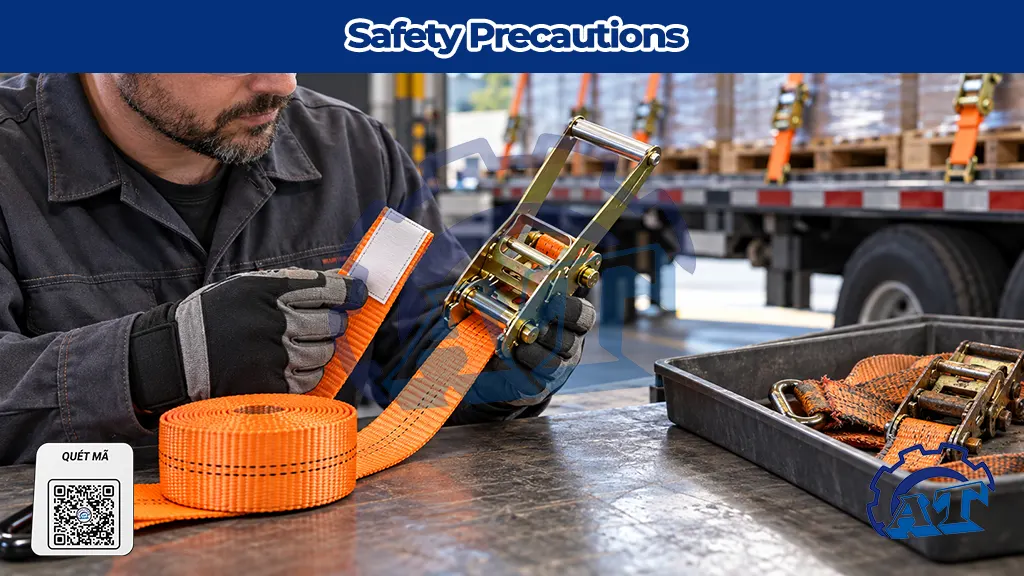
Working with high-tension cargo securing equipment requires strict adherence to safety standards. Keep these tips in mind:
-
Always wear safety gloves and eye protection.
-
Never use excessive force (like a hammer) when removing or installing bolts - this can invisibly stress or crack the buckle frame.
-
Ensure the new buckle's Working Load Limit (WLL) matches or exceeds the original strap rating.
-
Do not use repaired straps for overhead lifting under any circumstances - they are strictly for tie-down and cargo securing.
-
If you are unsure about the integrity of your repair, replace the entire strap or consult a professional.
Common Mistakes to Avoid
Avoid these frequent errors to ensure your cargo strap repair holds up on the highway:
-
Backwards Threading: Threading the webbing through the spool in the wrong direction means the buckle won't tighten properly, or the webbing will slip out under load.
-
Loose Fasteners: Not tightening bolts or screws enough allows the webbing to pull out dynamically when the vehicle shifts during transit.
-
Mismatched Sizes: Using the wrong buckle size (e.g., trying to force a 2" buckle onto a 1.5" webbing) leads to uneven tension, webbing bunching, and eventual failure.
-
Skipping the Post-Install Test: Failing to inspect the ratchet teeth and pawl alignment after installation can hide fatal mechanical flaws.
-
Ignoring Webbing Degradation: Attempting to put a brand-new buckle on old, UV-rotted, or chemically degraded straps risks total webbing failure.
Frequently Asked Questions About Ratchet Buckle Replacement
Can all ratchet buckles be replaced?
No. Only buckles attached with bolts, screws, or internal clamps can be replaced. Stitched or sewn buckles require full strap replacement.
How often should I inspect or replace ratchet buckles?
Inspect your gear at least once a year, or immediately after heavy, rough use in harsh weather. Replace the buckle immediately if you see severe wear, rust, or structural damage.
Can I replace just the buckle without replacing the webbing?
Yes, if the existing webbing is still in good condition - meaning there is no significant fraying, cuts, abrasions, or severe UV damage near the attachment point.
Where can I buy replacement ratchet buckles?
You can purchase heavy-duty replacement hardware from industrial strap suppliers, trucking equipment stores, or specialized online cargo strap retailers.
Final Thoughts on Replacing Ratchet Buckles
Replacing a ratchet buckle correctly extends the operational life of your tie down straps, saves your business money on constant replacements, and, most importantly, keeps your cargo secure on the road.
Always inspect your gear regularly, source high-quality replacement parts, and adhere strictly to manufacturer and safety guidelines. When in doubt regarding a cargo strap repair, the safest route is to replace the entire strap system.
Related News

15/10
2026
Match a ratchet buckle, webbing, and hooks across four criteria: webbing width, complete-assembly load rating (WLL/LC), operating environment, and anchor-point geometry. Pair the buckle to the webbing’s exact width and thickness, rate the assembly by its weakest link, and ensure hooks seat fully without tip loading.

15/10
2026
Understanding ratchet buckle load ratings is essential for safe cargo securement. This guide explains the difference between WLL (Working Load Limit), LC (Lashing Capacity) and breaking strength, shows how to read a ratchet strap label, and helps buyers select the correct ratchet buckle assembly for US, EU and Australian transport applications.

24/09
2026
Choosing between 25mm and 50mm ratchet buckles isn't just about size - it defines your Working Load Limit (WLL), safety, and compliance. To prevent load failures and budget waste, this An Thanh Tech guide breaks down capacities, applications, and OEM standards for B2B buyers.

24/09
2026
Heavy-duty 50mm (2-inch) webbing is only as safe as its ratchet buckle. The wrong hardware inevitably leads to strap abrasion or load failure. Learn how to select the correct 50mm buckle based on WLL, EN/WSTDA standards, and B2B OEM requirements.
View more